Don’t Get Burned Cleaning Your Dryer Vent: Mistakes Every Homeowner Should Avoid
What mistakes to avoid when cleaning your dryer vent
After months of hunting and cautious negotiations, you finally hold the keys to your new home. Every detail feels incredible: the new fixtures, the brand-new furnace, and yes, the dryer vent. Buying a home isn’t all fun and glamor, though! With owning a home comes regular maintenance and chores, like remembering to clean your dryer vent. Skipping this important part of keeping your home safe and cost-effective can quickly lead to hazards. Here we will highlight the mistakes to avoid. With this, cleaning your dryer vent is a consistent part of keeping your home safe and efficient.
Common Mistakes to Avoid When Cleaning Dryer Vents
Mistake #1: Not Cleaning Frequently Enough
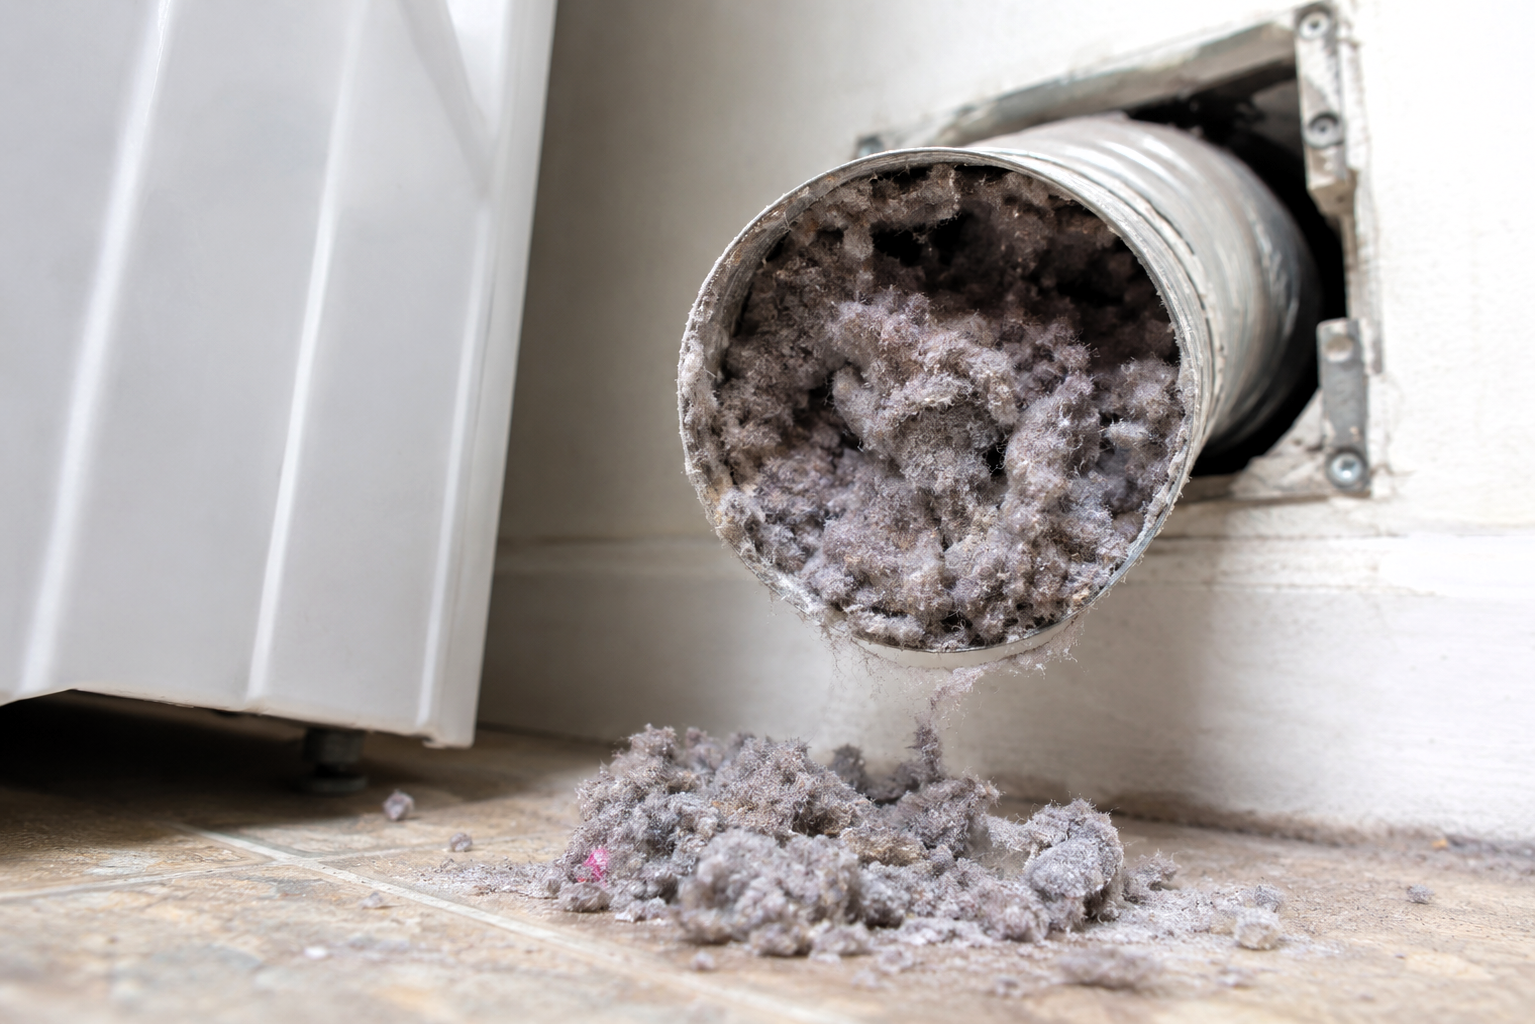
It is very important that you get your dryer vent cleaned on a regular basis. We suggest every six months at the minimum. If the vent hasn't been cleaned properly, it will continue to back the lint up into your dryer venting, the dryer itself, and your house. This creates a potential fire hazard and causes your dryer to run less efficiently, increasing energy consumption and wear. Regularly servicing your dryer will allow you to use it when you need it and for a longer period of time.
Mistake #2: Not Unplugging the Dryer
The first thing you need to do before you do anything with the dryer is to unplug it to discharge any potential electric shock. This is crucial and often overlooked. If you have a gas dryer, remember to shut off the gas valve as well. Never work on a powered machine; safety should always be your main concern.
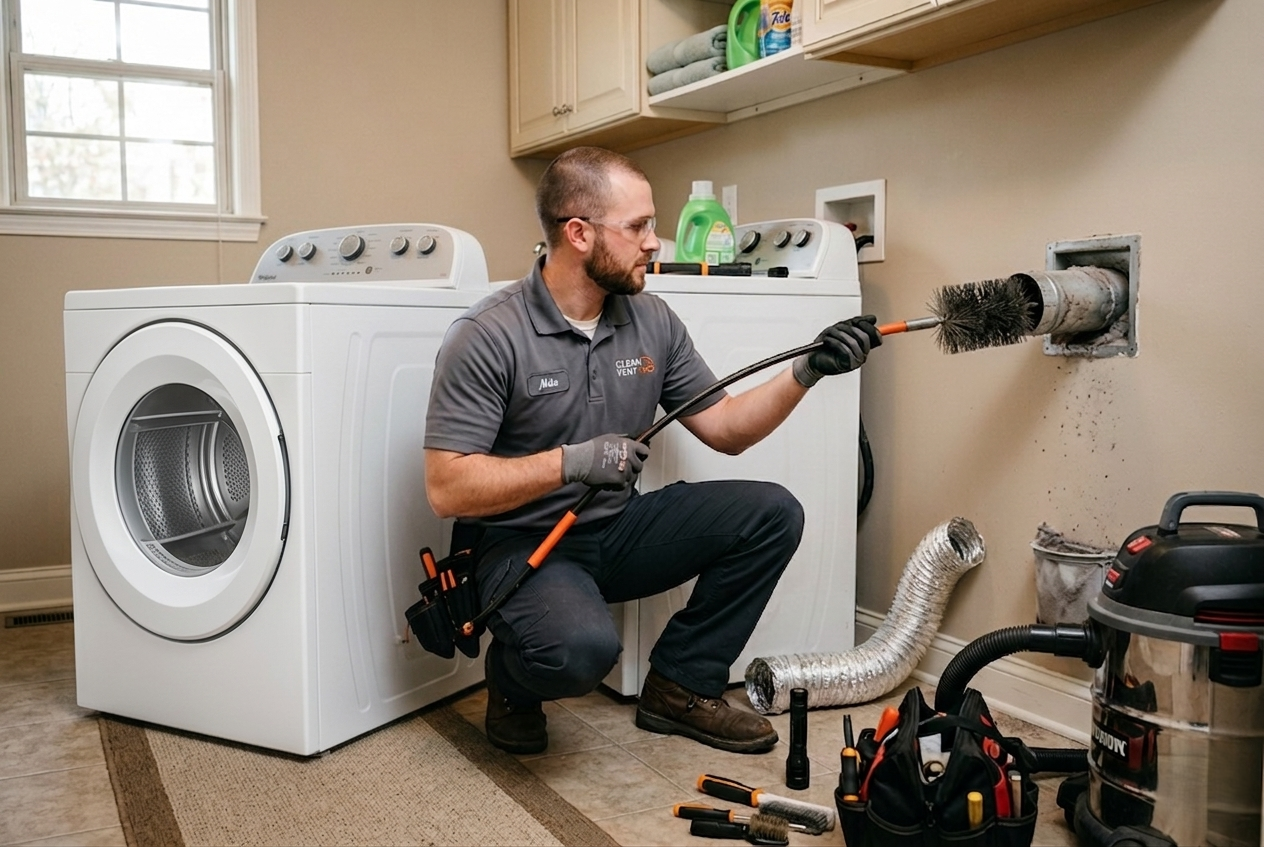
Mistake #3: Not Using the Right Tools
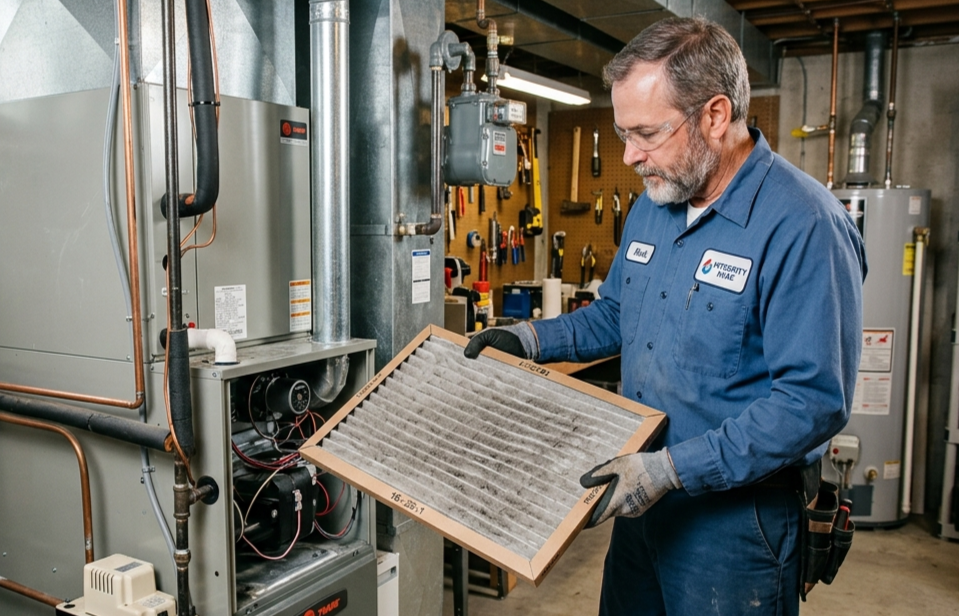
Many homeowners make the mistake of using standard household tools for dryer vent cleaning, which may not be effective. These tools often leave lint and debris behind. Investing in a proper vent cleaning kit—designed specifically for the task—can be a wise decision. Most of these kits come with flexible rods and long brushes, making it easier to reach and remove built-up lint.
Mistake #4: Not Checking for Obstructions
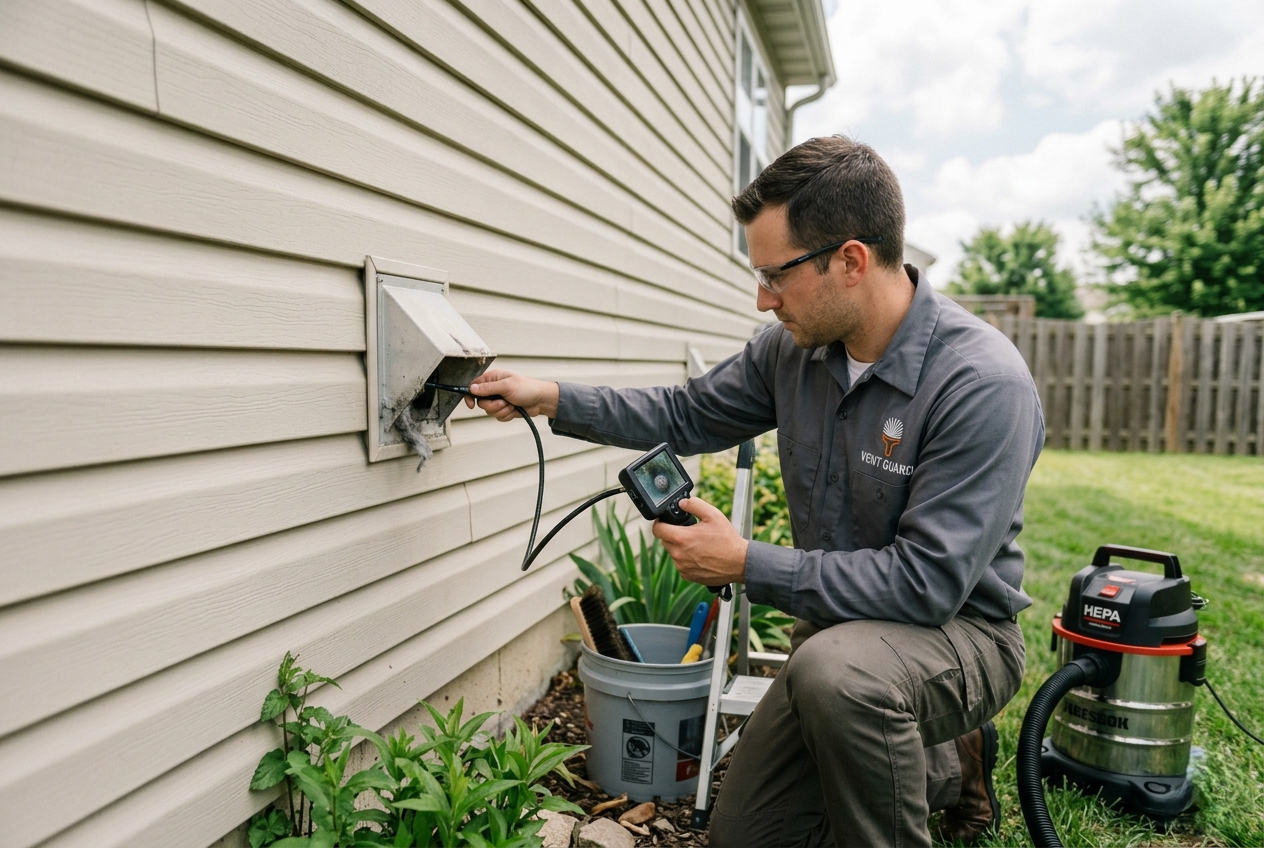
Lint is not the only thing that can jam your dryer vent. Sticks, acorns, small animals, and even birds’ nests can obstruct airflow. If you do not check for these potential blockages, your cleaning could be in vain. Use a flashlight and a flexible rod to identify and remove any obstructions.
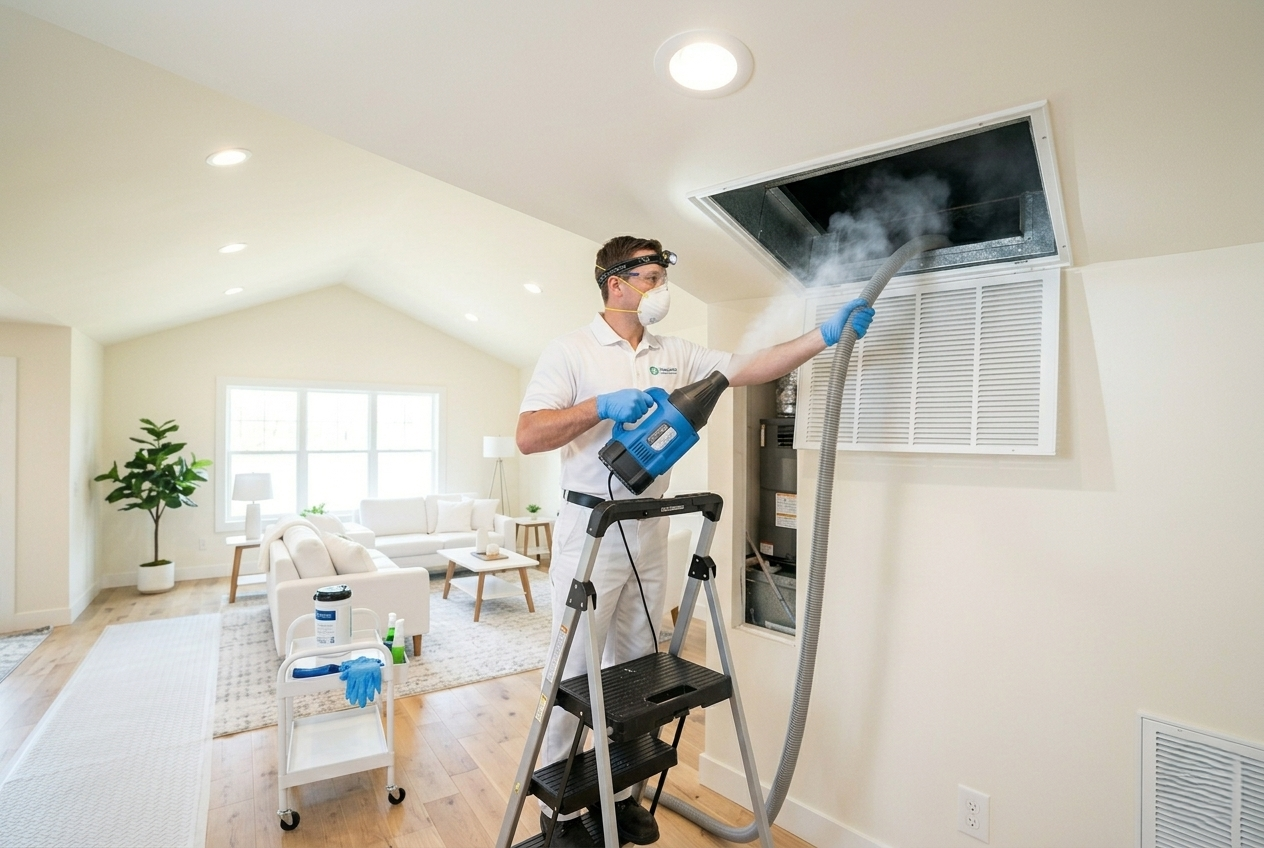
Mistake #5: Attempting to Clean a Long Vent Yourself
If the vent is particularly long, cleaning it yourself can pose challenges and risks. Strong angles and turns can trap lint and debris, making thorough cleaning difficult. In such cases, it is advisable to hire experts who have the tools and knowledge to effectively clean complex vent systems.
Mistake #6: Improper Reattachment of the Duct
Improperly reattaching ducts post-cleaning can lead to future lint build-up, rendering your efforts useless. Avoid sharp turns within the ducts, as they tend to trap lint and obstruct airflow. Instead, use metal tape for duct connections, as it offers a more secure seal and is heat resistant.
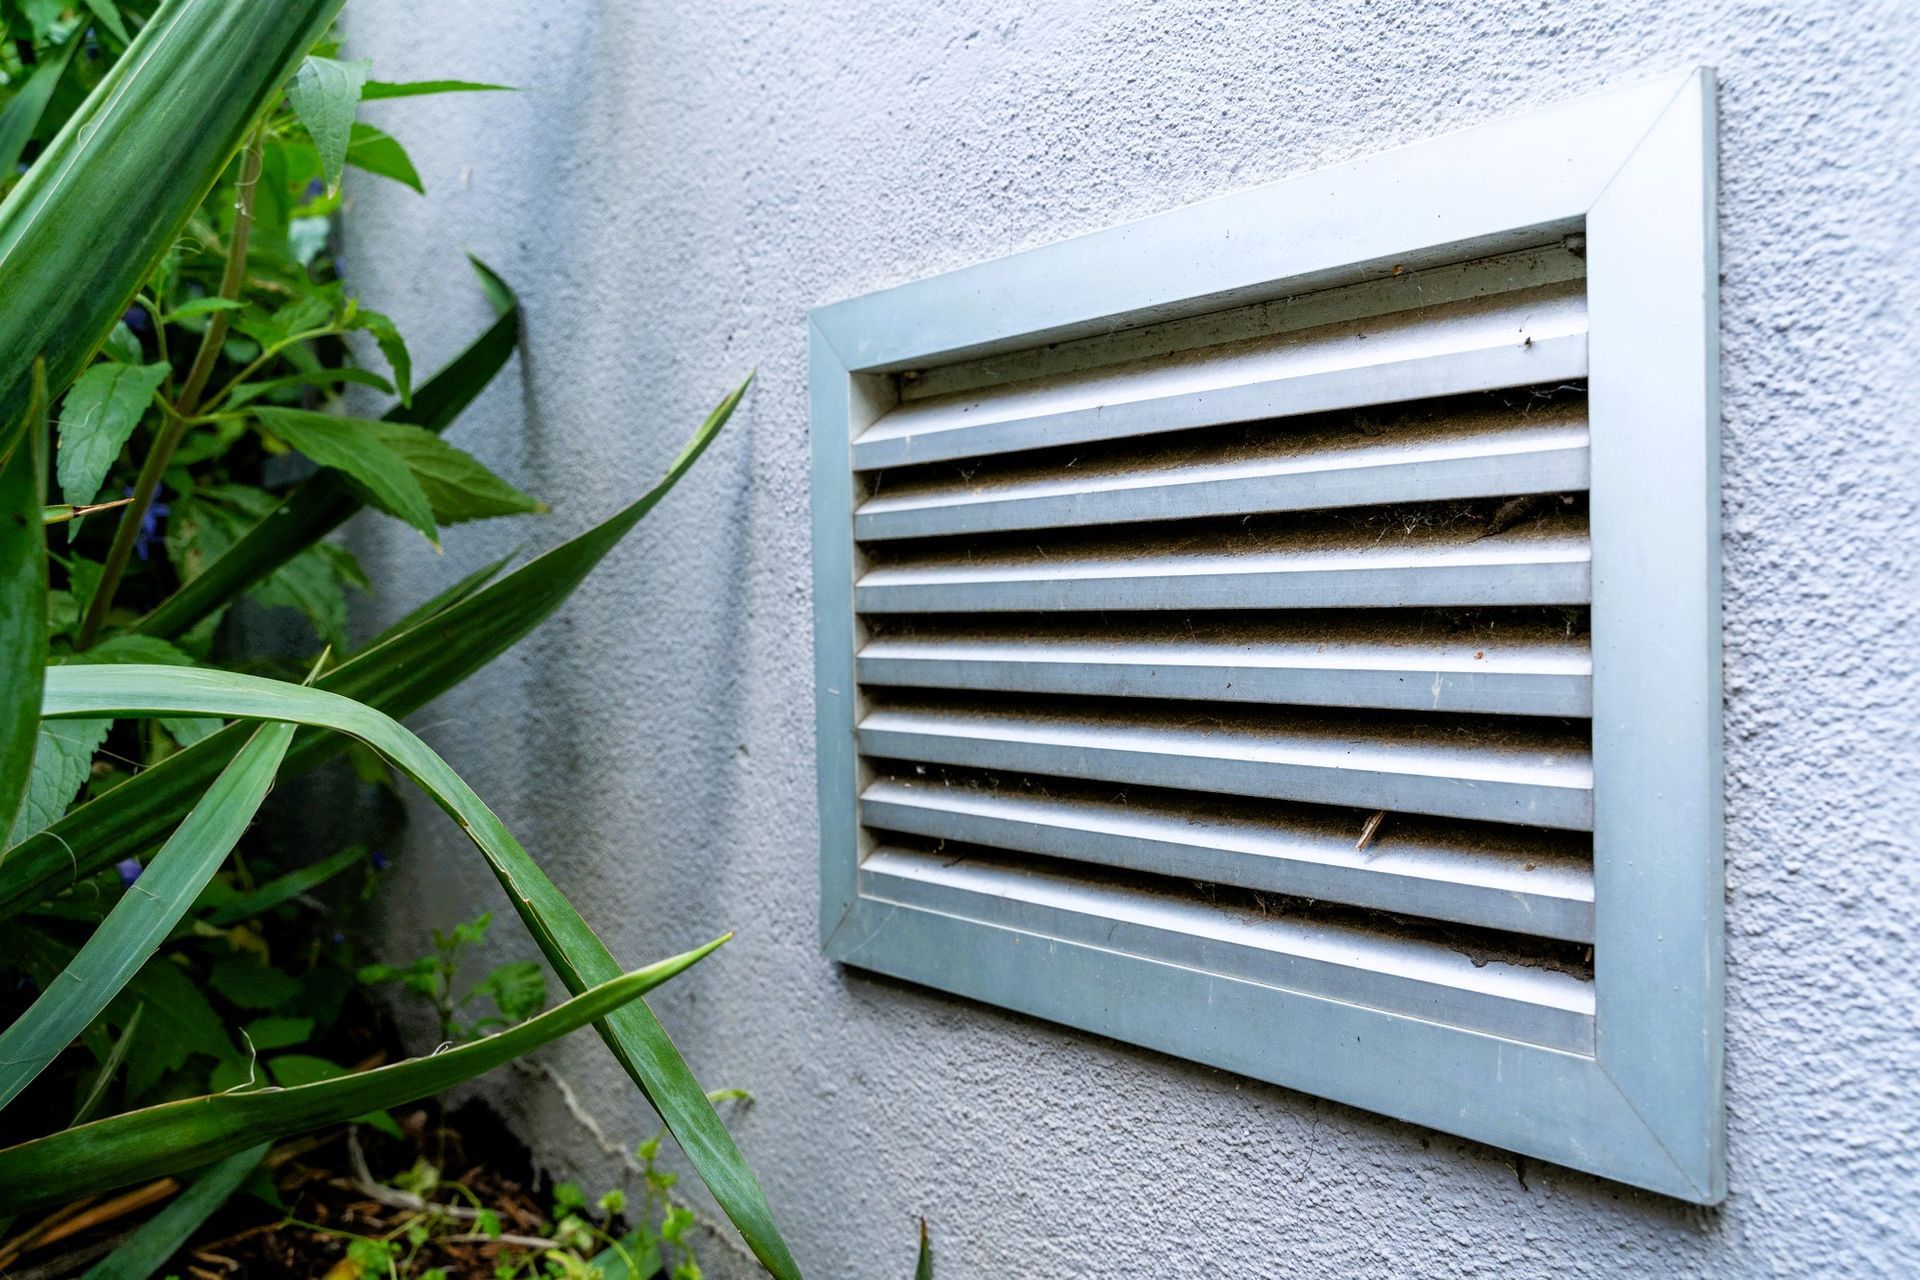
Mistake #7: Not Routing Your Vent Outside
It’s crucial to ensure your dryer vent exits your home. Vents that terminate inside can trap lint and promote the growth of mold, leading to safety hazards and health issues. Your laundry vent should always be directed outside to allow for proper airflow and moisture expulsion.
How to Clean Your Dryer Vent Properly
Step-by-Step Guide:
- Unplug the dryer or shut off the gas line – put safety first! Make sure the dryer is totally disconnected from power.
- Move the dryer away from the wall – That lets you access the vent.
- Unhook the duct from the dryer and the wall – Remove the device to start cleaning.
- Shake out loose lint and vacuum or use a special tool for a thorough cleaning – Shake out all of the lint you can.
- Vacuum the lint from the outside vent – Do not forget to clean the outside vent because all lint must be removed.
- Scrub the surrounding floor area – Little bits of lint can collect around the dryer, so clean the area well.
- Check the duct for damage, and replace it if there's any – A broken duct can lead to inefficiency and disaster.
- Reattach the dryer vent via screws, clips or metal duct so that it will not come loose and let lint pile up again.
- Put the dryer back where it was – Move the dryer back against the wall.
- Plug in the dryer or turn the gas supply back on – Now, you can reconnect the dryer to electricity or gas.
By following the steps outlined above, you can ensure a properly cleaned and functioning dryer vent.
Importance of Keeping Your Dryer Vent Clean
In conclusion, a clean dryer vent is essential for ensuring the effective and safe operation of your dryer. With the right information and techniques, you can clean your dryer vent without hassle, helping you to prevent fire hazards and prolong the lifespan of your appliance. Regular cleaning also enhances dryer efficiency and reduces energy costs. Whether you choose to do the job yourself or hire a professional, ensuring that your dryer vent operates properly is one of the most secure ways to maintain your home. For professional service,
contact Lakeshore Air Duct Cleaning and ensure your home stays safe and efficient!
You might also like